


Understanding the Role of Camera Placement in a Controlled Studio


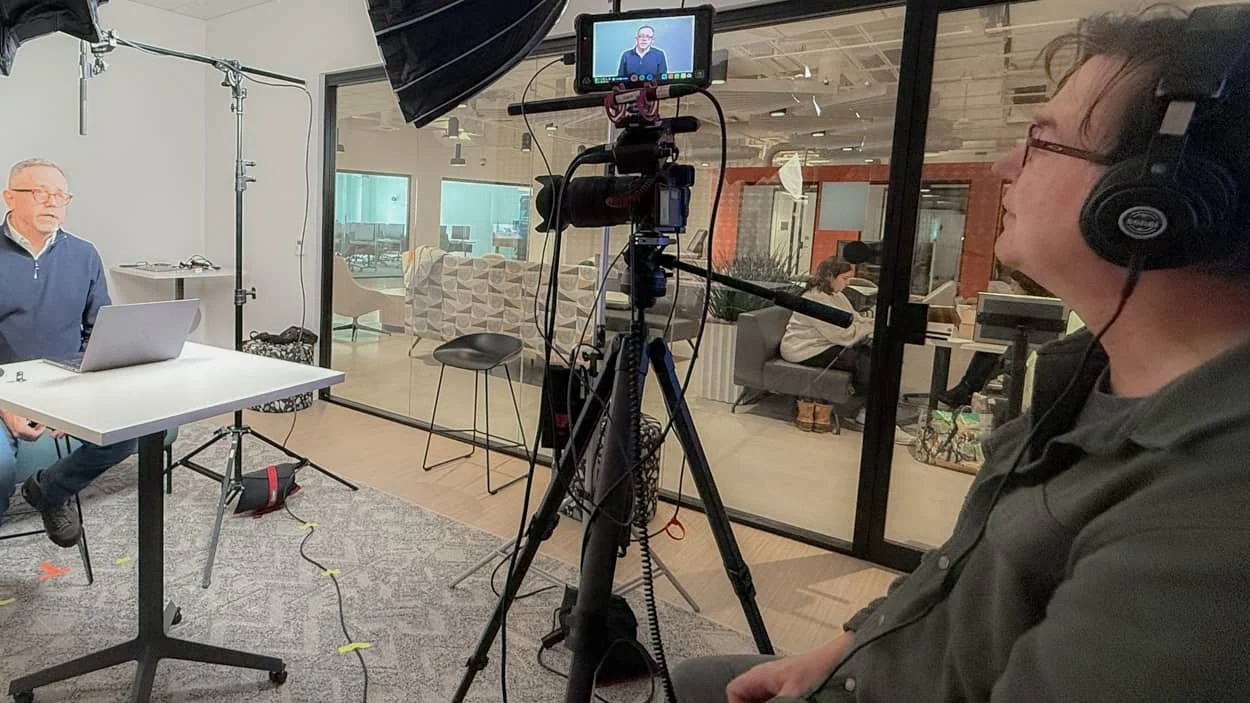
In a studio environment, the camera is not just a recording device—it defines perspective, depth, and visual quality. Unlike outdoor shooting, where conditions are unpredictable, a studio offers full control. That control, however, also means that poor placement becomes immediately visible.
Camera positioning determines how natural the subject appears. A camera placed too high introduces distortion and disconnects the viewer. Positioned too low, it creates an unnatural dominance or imbalance in framing. The most effective baseline is aligning the camera at eye level, which preserves proportions and creates a direct visual connection.
Distance also plays a critical role. Placing the camera too close results in facial distortion and an exaggerated perspective, while positioning it too far reduces detail and weakens subject presence. A balanced distance ensures clarity while maintaining natural proportions.
Framing and Composition in Studio Shooting
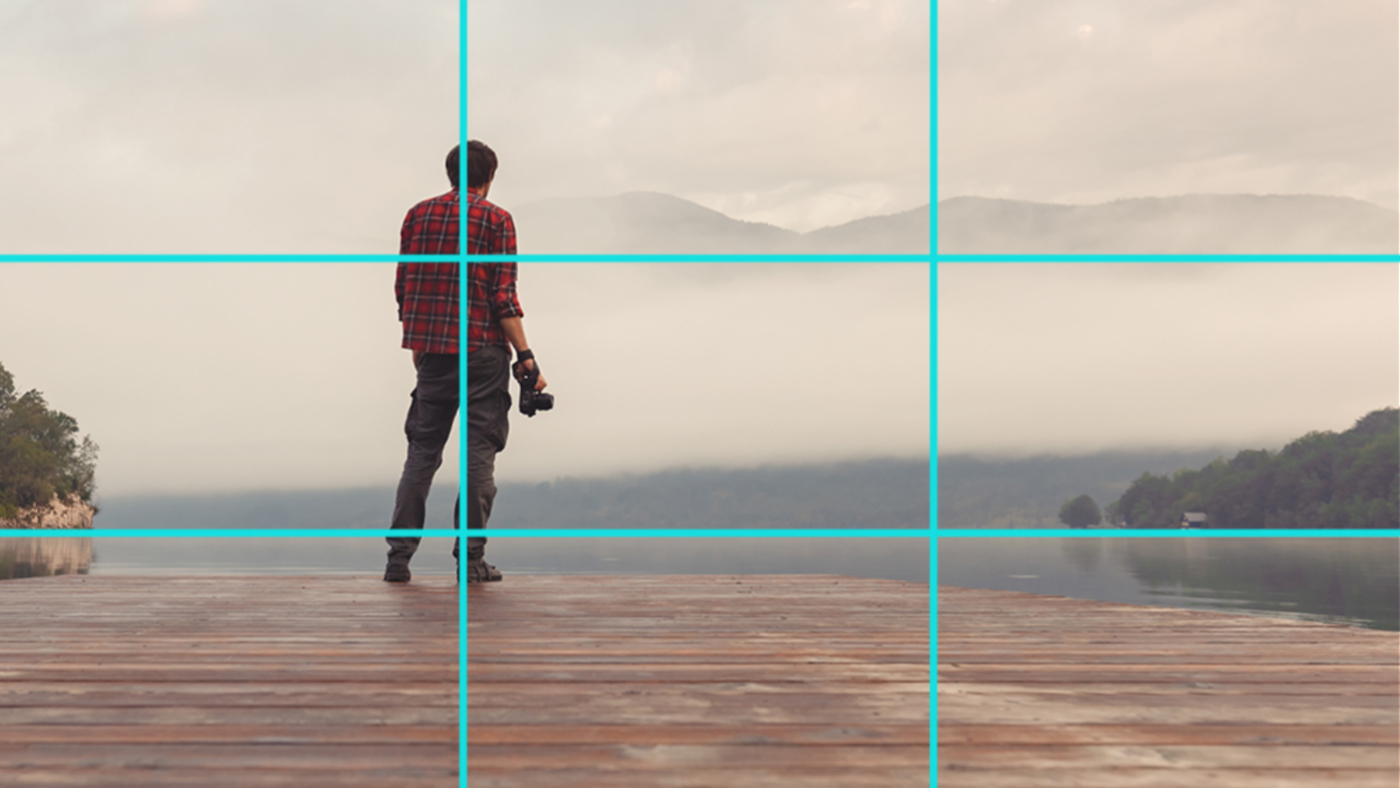
Framing is the process of deciding what the viewer sees and how it is arranged within the frame. In studio setups, composition must be intentional because there are no external elements to compensate for poor framing.
The rule of thirds is commonly applied, placing the subject slightly off-center to create a more dynamic composition. However, for talking-head content, a centered composition often works better, especially when combined with balanced background elements.
Headroom and spacing should be controlled carefully. Too much empty space above the head makes the subject appear disconnected, while too little creates a cramped frame. The goal is to maintain visual balance without drawing attention away from the subject.
Background elements should support the subject rather than compete with it. Depth can be created by increasing the distance between the subject and the background, allowing for a more cinematic look.
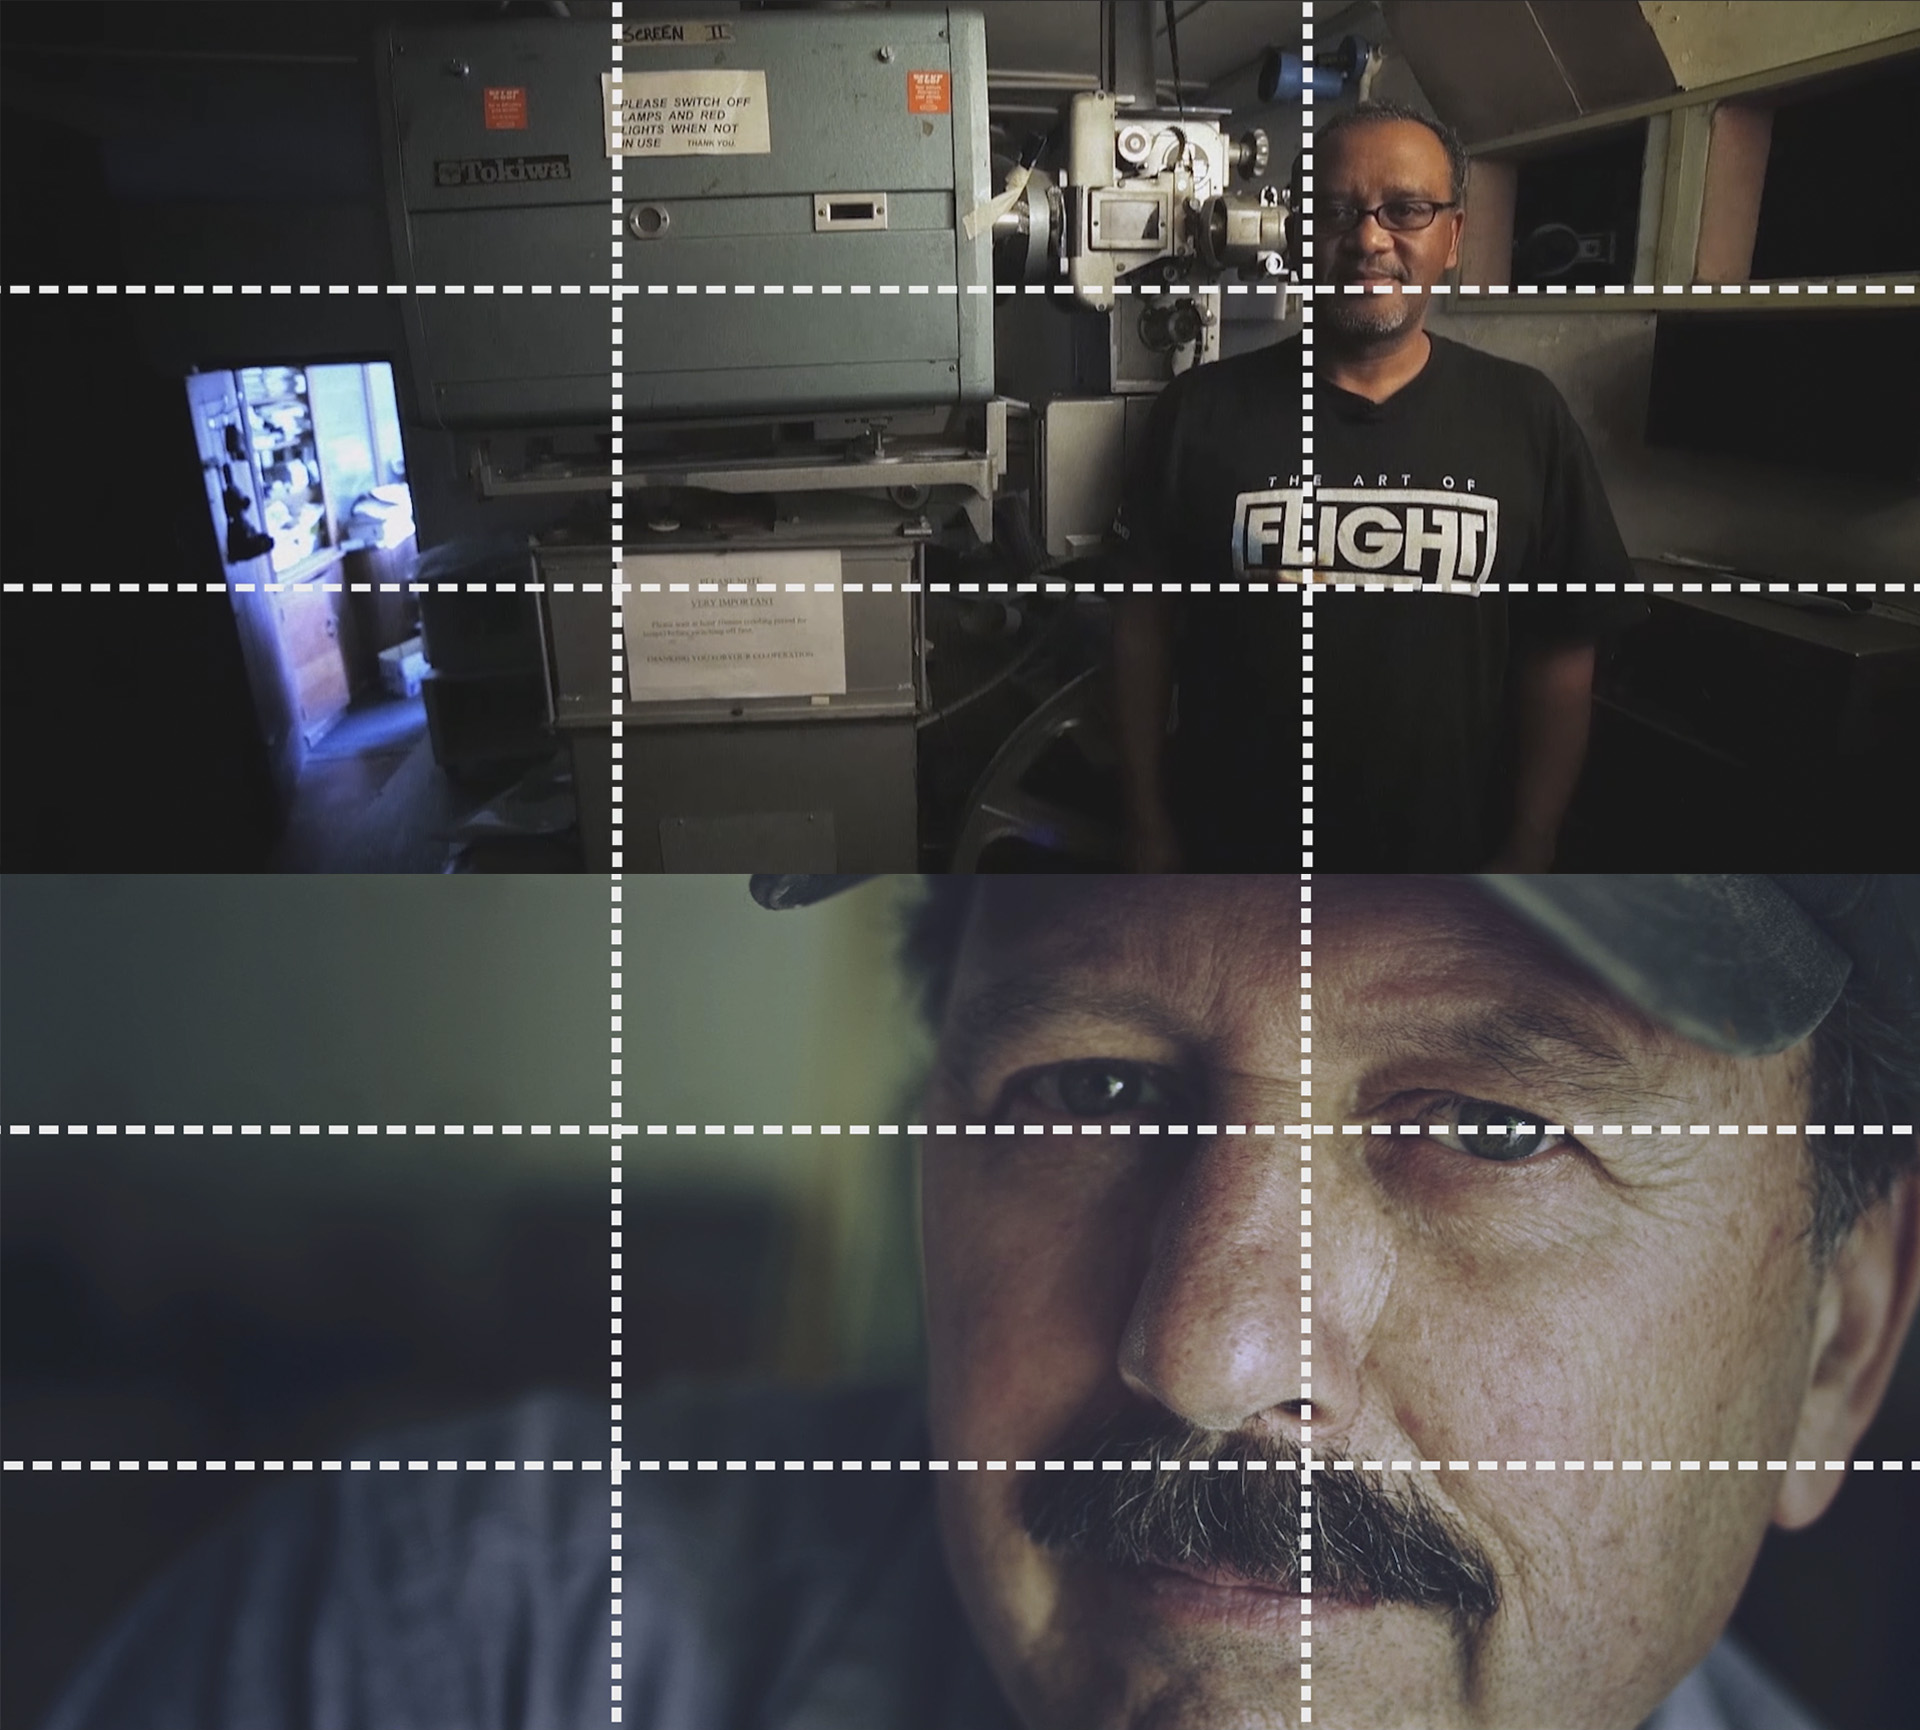
Camera Angle and Lens Selection
Camera angle directly affects how the subject is perceived. A neutral, eye-level angle produces the most natural result, making it the standard choice for interviews, YouTube content, and professional recordings.
Lens selection further refines the visual output. Wider lenses (such as 24mm) capture more of the environment but introduce distortion, especially at close distances. Standard focal lengths (35mm to 50mm) provide a more natural perspective, closely matching human vision. Longer focal lengths compress the background, creating a more cinematic and isolated look.
The choice of lens should align with the intended visual style. For most studio setups, a 35mm or 50mm equivalent offers the best balance between natural perspective and subject isolation.
Lighting Alignment with Camera Position
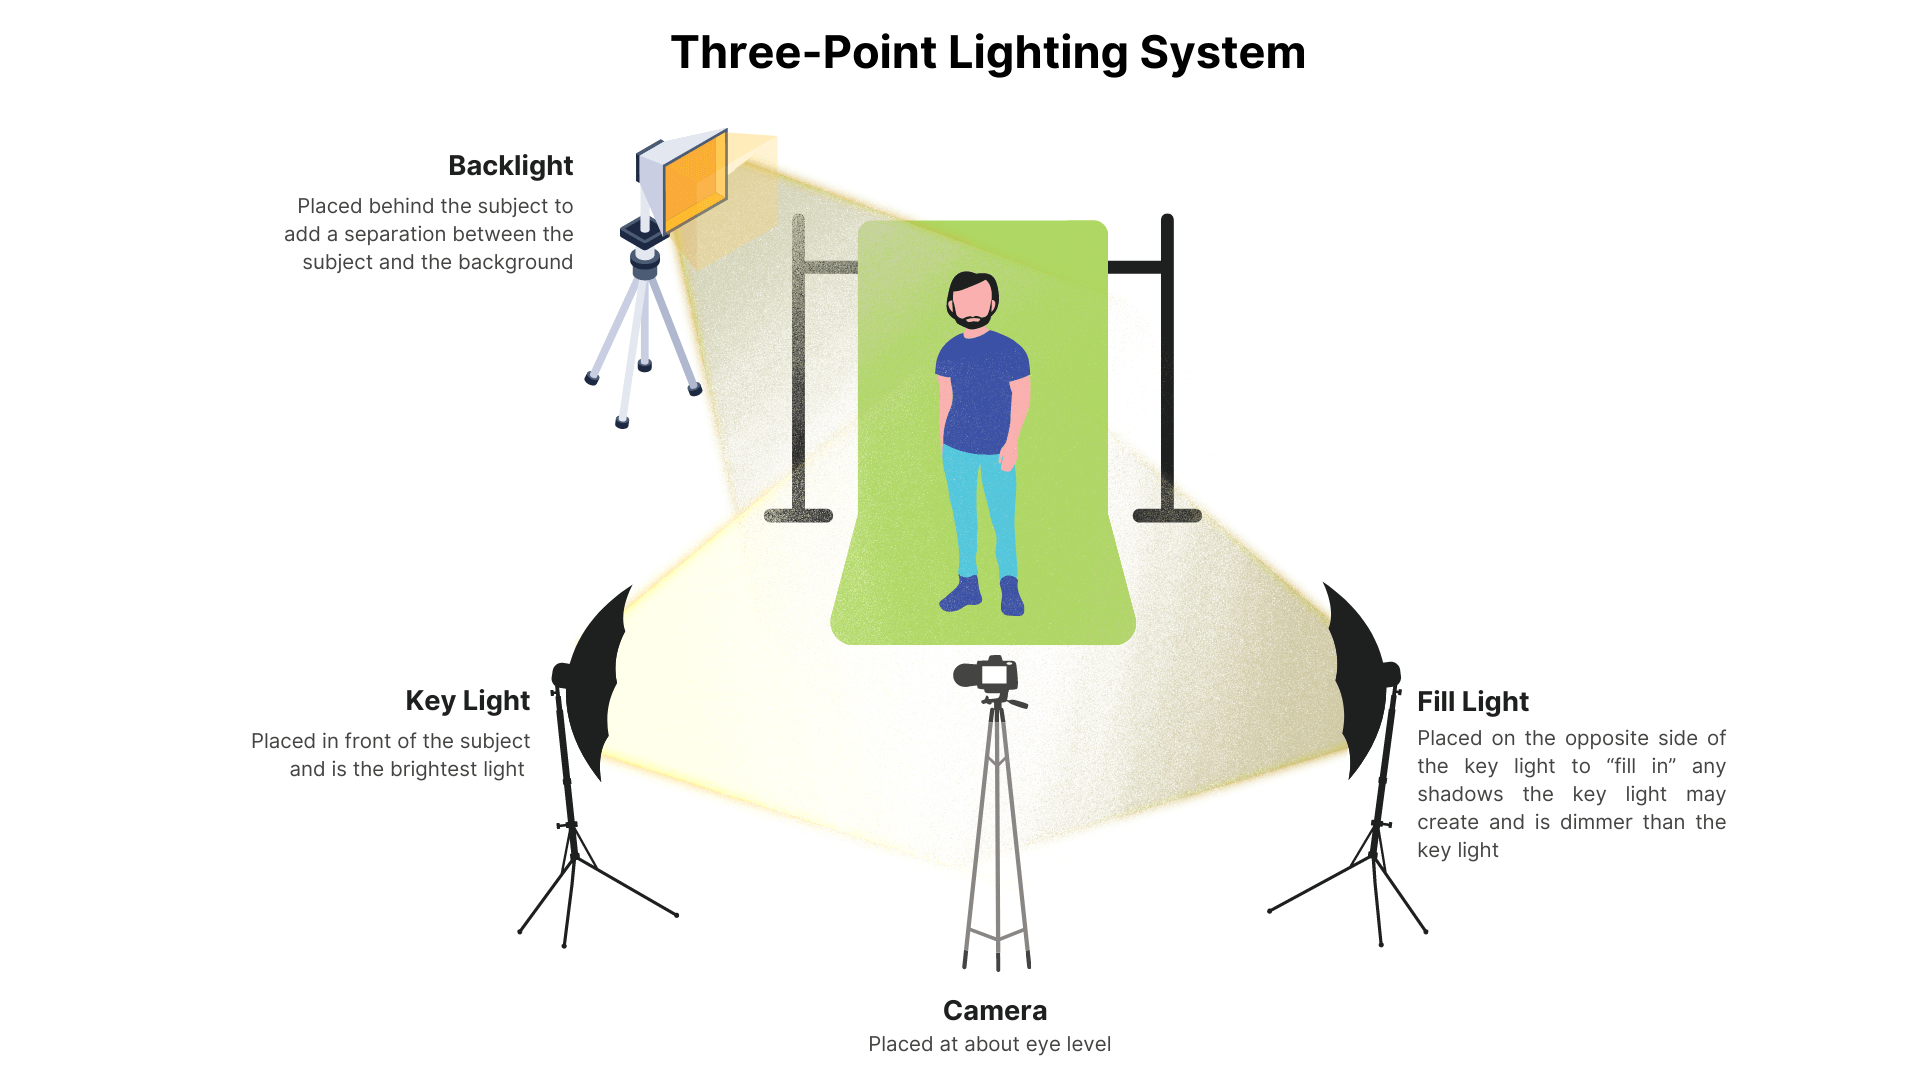
Camera setup cannot be separated from lighting. The position of the camera determines how light interacts with the subject.
The most widely used configuration is three-point lighting, consisting of a key light, fill light, and back light. The key light is typically placed at a 45-degree angle from the subject, creating depth through shadows. The fill light softens these shadows, while the back light separates the subject from the background.
If the camera is positioned incorrectly relative to the lighting, shadows may appear harsh or unbalanced. Aligning the camera with the lighting setup ensures that the subject is evenly lit while maintaining dimensionality.
Stability and Camera Support

Stability is essential in studio shooting. Unlike handheld footage, studio recordings rely on consistency and precision.
A tripod is the most reliable solution, providing a fixed frame that does not shift over time. For overhead shots or specialized angles, mounting systems can be used to secure the camera in unconventional positions.
Even minor vibrations or shifts can reduce perceived quality, especially in high-resolution recordings. A stable setup ensures that the viewer’s attention remains on the content rather than the movement of the frame.
Optimizing Background and Depth
Background design plays a crucial role in defining the overall look of a studio setup. A flat background makes the image appear static, while depth introduces visual interest.
Increasing the distance between the subject and the background allows for better separation, especially when combined with a wide aperture lens. This creates a blurred background effect that draws attention to the subject.
Lighting can also be used to enhance depth. Adding subtle illumination to the background prevents it from appearing completely flat while maintaining focus on the subject.
Conclusion
A professional studio camera setup is not defined by equipment alone, but by how each element is positioned and aligned. Camera placement, framing, lens choice, lighting, and background all work together to shape the final image.
In a controlled environment, small adjustments produce noticeable differences. Precision becomes the defining factor. When each component is positioned intentionally, the result is not just a clean image, but a visually coherent and professional output.


